Saturday, May 28, 2011

Sweet,Sour and Spicy Tofu....that you might just love.

Many people have reservations when it comes to eating tofu and for many reasons.Some don't like the texture,some can't stand the flavor and some just don't want to try it at all but I think it all comes down to how you prepare it. Tofu has always been a big part of my food world.It is used in many classic Chinese dishes and growing up in a very Chinese populated island,I was exposed to it from a very young age. From a side dish in a meal to dessert,I've had it all so I have never had a problem with it.Living in the US,I realized that many were not fans of tofu and one of whom is my husband.So, I got down to the whys of the dislikes not just with him but with others and found out,they have not been introduced to the best of tofu.
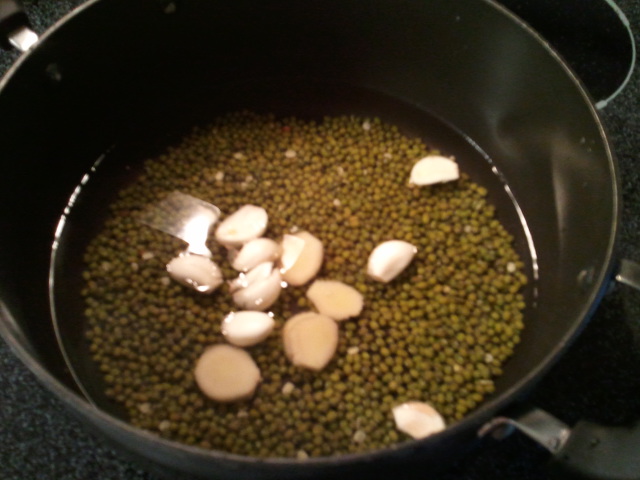
Now,here's a very bold recipe that I love and it also is a great compliment to my mung dhal dish that I would like you to try.

Sweet,Sour and Spicy Tofu

You'll need:

2 packs Very firm Tofu(cut into 1 1/2 inch cubes)
1/3 cup Tomato Ketchup
2 inches Ginger (sliced thinly)
1 Onion (sliced thinly)
2 tbsp Tumeric
1 tbsp Chili powder
Stevia and salt to taste
1 1/2 tbsp Oil

1/2 cup Oil(for frying Tofu)


Method:


In a frying pan or large skillet,heat 1/2 cup oil.In the mean time,sprinkle tofu cubes with some tumeric powder,enough to coat each side and 1/4 tsp of salt.Check oil by adding a small piece of tofu and it should sizzle. Add tofu,one at a time and allow some space in between each piece so not to stick together.You are surface frying with that amount of oil so make sure not to move the tofu until the edges are crusted and golden or else,tofu will stick to the pan.Fry each side till golden brown and let it sit on a plate lined with paper towel to absord access oil.You may need to fry up to 2 batches.Once,its all fried up,set aside.

In a small bowl,mix the tumeric powder and chili powder with enough water to make a thick paste.
 
In a seperate skillet(or you could use the same one.Just discard all but 1 1/2 tbsp oil),heat oil and add ginger.Fry till fragrant and add onions.Fry till light brown.Add in the paste and fry.Try not to make it too dry so feel free to add small amounts of water to avoid burning.Once bubbles start forming with the paste,add Tomato ketchup and salt.If the dish is too spicy,you may add the stevia or even honey to dum down the heat.Feel free to adjust the taste accordingly if you don't have a balance of the 3 flavors.This needs to be done before adding the tofu.Once you get the right taste (flavors can vary according to the ingredients you use),add on the tofu and mix well with the sauce.Let it simmer for about 10 minutes and turn off heat.


Another delicious dish ready to be served.By frying the tofu,you are taking away from the mushy typical tofu texture and actually give it a more chicken like texture.It's a great trick for your taste buds and mind if you have a problem with tofu.As for the flavors,the sauce has such great flavors that you won't even taste 'yucky tofu'.So,give it a try and its a great alternative to chicken if you are trying to cut down poultry.This is a great recipe to make as it is simple and doesn't require too many ingredient.

 As always,I'd love to hear some feedbacks so do give me some either here or by email.Hope to hear from you!


With love for food and you,
      Renu


Mung Dhal with Spinach....a delicious family dish.

This is one of my all time favorites in the family recipes.There are quite a few different versions of the same curry but this is my grandma's special which I learned from my mother.If I'm not wrong,all my mother's sisters(she has 5)prepare it this way and I love to have it with a few of my favorites like the sweet,sour and spicy tofu and Indian fried fish.Last week,I introduced that combo to my son and husband and much to my surprise,they enjoyed it very much.My son really wasn't the shocker as I've trained him from a young age to enjoy whats on his plate (sometimes with difficulties,might I add) but my husband who in his whole life,has not had fish actually loved the fried fish I made to go with the dhal.A very rewarding surprise.So on this post,I will be sharing with you the dhal recipe but keep an eye out for my posting of the great side dishes.Its a very Southern Indian meal.


 Mung Dhal 
Mung Dhal with Spinach


You'll need:

2 cups Mung Dhal (Soaked in water during prep)
8-10 cloves Garlic (whole)
2 inches Ginger (cut into slices)
2 tbsp Tumeric powder
1/2 tbsp Chili powder(optional if you like some spice)
1 tsp Asafoetida (also known as Hing..Optional)
3 cups Spinach (try using whole spinach.if too big,you can chop them)
2 tbsp Coconut milk(thick) or cream
Salt to taste


2 tbsp Ghee(Indian clarified butter) or vegetable oil
1/2 tbsp Black mustard seeds 
6-7 Curry leaves(if available)
3-4 Dried chilis
1/2 Onion or 5 shallots (cut into thin slices)


Method:


Initial boiling with whole garlic and ginger
 In a 5-Qt pot, add 4 cups of water and add mung dhal,garlic and ginger.Bring to a simmer and add tumeric,chili powder and asafoetida(if used).Let it come to a rolling boil and turn the stove down to  medium heat. Cover and let it simmer for about 15 minutes or until mung dhal is soft.Add water as needed as it can evaporate fast.Stir occasionally.Once the dhal is soft,add water filling about half your pot.Add in the spinach and stir.Cover and let it cook till the leaves are softened.This will take about 10 minutes. Add in the coconut milk and let it come to a boil before adding salt to taste.Turn off heat and set aside the pot.

 In a small skillet,heat ghee or oil and add mustard seeds,curry leaves and dried chilis and fry till fragrant.Once the mustard seeds start popping,add the onion slices or shallots and fry till light brown.Pour in the fried ingredients into the pot of dhal and stir to mix.Immediately,close the pot with a lid to infuse flavors. Serve with rice or chapati.

As we call it 'Pachaiperru dhal' all ready to be served
It's as simple as that.I know of a friend who loves to have it like soup and you could to but I've just been used to having this with rice so thats my recommendation.Asafoetida is traditionally added to dhal dishes to help with digestion.Any dhal can be a cause of stomach discomfort with gassiness so asafoetida is a herb that helps with that.So,if you can find it(Indian stores usually carry it),do use it even if you are making a simple lentil soup.It does not influence the flavor as much. It does have a strong smell when raw but when cooked,you won't smell it.The powdered form usually has a very mild smell to it so if you find it,that would be the best option for asafoetida as suppose to the whole form that you'll have to grate.

Well,have a great time trying it.Its super delicious and as you can tell from the ingredients,very nutritious.


With love for food and you,

      Renu

Tuesday, May 24, 2011

Chapati......healthy chapati!

Many people may not know that chapatis are low in calories as it is made with whole grain wheat flour also known as ' Atta' flour if you are ever go to an Indian grocery store.They are not your regular processed wheat flour.Atta flour actually has a rough texture unlike your regular flour which has a very smooth, powdery texture.They are not only a great bread to have with your curries,they are also very simple to make once you get the hang of it.Just like any other cooking,you'll need to keep trying till you get the techniques of making it down.
So here is the recipe and do let me know how it goes if you try it.


Chapati


You'll need:

2 cups Whole grain wheat flour
1 cups Warm milk (or in room temperature)
Salt to taste(optional)-add it to the milk,if used, to make the mixing easier.
2 tbsp cooking oil or smart balance buttery spread

1 clean kitchen towel or a piece of cloth big enough to wrap your chapatis in.
Rolling pin


Method:

In a medium bowl mix the flour with the warm milk using your clean hand.Add the milk in small amounts so you can get the right consistency for the dough.You want to make sure you get a soft dough but avoid making it too moist as this will give you a very sticky dough.If you do get too sticky a dough,add a little bit of flour to get a kneadable dough.Once its all mixed up,make a little well in the dough and add the cooking oil or butter to it.Continue kneading.
    The key to a soft chapati is in the kneading.I find that the more you knead,the smoother your dough becomes which results in soft chapatis.So go ahead and use this as a great stress release method.:)

 Knead for about 10-15 minutes the least and then wrap the dough in your kitchen towel or cloth and let it rest for about another 15 minutes.Once the dough is ready,divide it into equal portions and roll them roughly into the size of a golf ball.Make sure you roll them until you get a smooth,rounded ball to avoid cracking when you roll with your rolling pin.

     Once you are ready to roll them out into your chapatis,lightly spread some flour around your work surface and some on your rolling pin.Also,coat some flour on your ball of dough before rolling out to avoid sticking. Flatten the ball of dough on your work surface and begin rolling with the pin applying gentle pressure.You don't want to press down too much as this will make the dough stick.Constantly pick up your flattening dough and flip them as you add more flour as needed.Once you have a flat,round chapati the size of your liking,you are ready to cook them. Don't worry about making a perfectly round chapati.I don't always get a round one either.


Heat a flat bottomed pan on medium heat.I use a medium sized omelet pan.Add your chapati to the pan.You will start noticing little air bubbles surfacing on your chapati.I use a ghee(Indian clarified butter) coated paper towel or small piece of cloth to gently push down on the parts that look uncooked to help with the process.Make sure you don't burn the bottom.Little dark brown spots are ok.Once,the one side is cooked,flip over and do the other side.When it is done,wrap the cooked chapatis in the kitchen towel to maintain heat and softness till you are done with the rest.


There you have it.It looks like a lot but I was just elaborating at length to make sure I explain the process clearly as making chapatis can sometimes be tricky.Also,I used milk because it makes softer chapati than adding just water,which you could do,if you're lactose intolerant.So,give it a try and I hope you have a good experience with it.Don't hesitate to ask me any questions.I'm always here to help you get the best out of these recipes.Chapatis are best served with any Indian meat dishes or vegetarian dishes especially potatoes or dhal.Have fun!


With love for food and you,
        Renu
 

Sunday, May 22, 2011

Not Always Fine And Dandy!

  I want you to know that not always does a recipe go well and everything doesn't always come out picture perfect.I have had my share of  'nothing-is-going-right' moments. Worse is when I am about to have friends over for dinner and end up having to quickly make something else to serve.One such incident happened recently to me.As my husband put it,my lucky charm of preparing great foods went out the window as soon as I turned 27.It WAS my first cooking after my birthday and nothing but the chapati(whole wheat indian flat bread) came out right.So I guess somewhere in my kitchen,my lucky charm was hanging by a thread.Anyway,long story short,I had friends visiting us from Montreal that weekend and was gonna cook for them this great Indian meal of Butter chicken,Indian cauliflower with peas and Chapati.I had to grill the chicken in the oven on 500 degrees F and when I opened the oven to check,I ended up getting a burn just from the heatwave.Note to all,don't reach over the door upon opening an oven at that temperature.So,with a burning right hand(I'm a righty),I proceeded to cook and everything went downhill.The chicken overcooked and became rubbery and the cauliflower burned while I was getting something for my hand. The butter sauce though came out pretty well but the cauliflower dish was not salvagable,sad! Our friends were such good sports and had my sadly failed dish for dinner.They actually liked the flavor of the butter chicken dish.They called it the 'Chewy chicken dish' and even had it for lunch the next day.It tasted good but it was like you were chewing on a chicken flavored chewing gum.Lol!Since it was a really good recipe,I will still share it with you.My next post will be on the Chapatis.

Non-Chewy Butter Chicken Recipe


You'll need:

6  Chicken breasts, cut into 1-inch cubes
Juice of 1 Lemon
Salt and Red chili powder, to taste
1 cup Yogurt
2 tsp Ginger
2 tsp Garlic
1 1/2 tbs Tandoori masala(you can get this at the international aisles at ur local grocery stores)
3 tbs Butter
2 Cardamoms
1 Cinnamon stick
2 Cloves
4  Ripe tomatoes, blended
1 tbs Tomato paste
1 tsp Garam masala
1 tbs Honey or Agave nectar
1 tbs dried Fenugreek leaves(if unavailable,you can use 2 tsp of Fenugreek seeds)
1 cup and 1 tbsp  Heavy cream
extra Butter or Coriander to garnish
1 1/2 cups Frozen Peas (optional)


Method:


Marinate the chicken cubes in lemon juice, salt, chili powder, yogurt, ginger, garlic and tandoori powder for at least half an hour. Overnight would be the best. Preheat the oven to the highest grill setting which is about 450 degrees F - 500 degrees F. Place the chicken on a baking tray closest to the grill and grill for at least 10 minutes on each side or until cooked.Make sure you don't exceed the time as this will result in my famous 'Chewy Chicken'. Allow the chicken to cook until it JUST starts to char.If you have a barbecue grill,you can grill it right on that.It actually might be a safer method....from my experience. You just have to make sure the chicken cubes are tender and moist.Remove from oven or grill and set aside.
To prepare the gravy, heat and melt the butter. Add the the cardamoms, cinnamon sticks and cloves. Stir fry for a minute before adding the tomatoes and tomato paste, Let this simmer on low to medium heat, half covered, for about 15-20 minutes. You will notice the gravy thicken and the oil will form a film on top. If the gravy is too thick, you can add a small amount of water . Add the rest of the ingredients as well as the grilled chicken and simmer for another 15 minutes. You can add frozen peas if you wish and let it cook for another 5 minutes or so. Garnish with butter or coriander.


I don't have many pictures as it wasn't a fun day of cooking.Despite my husband's prediction of me  losing my charm in cooking,I want you to know that I have re-discovered it and am in full steam with my cookings so fear not,there will be many more recipes to come.The lesson here is that regardless of failed attempts,the one thing you must never do is give up and never attempt it again.As the old saying goes 'Practice makes perfect' and yes,it implies to cooking too.Haha....have a great time trying and serving this delicious dish.You can serve it with any Indian breads or rice.

With love for food and you,
Renu

Wednesday, May 18, 2011

Simple Yet Nutritious And Delicious!

Tonight's dinner for my family was something I  enjoyed as a child.It is an easy dish to make and it doesn't take too much time. After a weekend of having great company to entertain and cook for,I decided to take it easy with the cooking.This is my 30 minute meal for you.


Thai Fried Rice(Khao Pad)


You'll need:

1 1/2 cup Cooked rice of your choice(refrigerated overnight for dryness)*I like brown basmati rice
1/4 cup Onions (chopped)
1 1/2 tsp Garlic (finely chopped)
2 tbsp Scallion (chopped,both white and green parts)
1/3 cup Tomato (diced)
1/2 cup Frozen peas (thawed)
1/2 cup Chicken breast (cut into small bite sized pieces)
10-12 Shrimp (medium sized,easy peel or shelled)
1 tsp Light soy sauce
1/4 tsp Agave nectar(if not available,use other natural sweeteners)
2 Eggs
1/2 tsp Salt
1/3 tsp White pepper powder(if unavailable,substitute with black pepper)
1 tbsp Lime juice(lemon juice can be used as well)
1 1/2 tbsp Oil (save the 1/2 tbsp for later)

Garnish:


A handful Cilantro
Lime wedges


Method:

Heat oil in a wok(or skillet).Saute onions and garlic till they turn golden brown.Add chicken breast and saute till the meats' cook.Add in the shrimp and saute for another 5 minutes.You'll notice the shrimp turning orange in color to show that its cooked.Add the rice and stir well.Make sure you break up chunks of rice before adding it into the wok.Stir in the tomatoes and thawed frozen peas and mix well with the rice.Move the rice to a side and add the 1/2 tbsp of oil.


Crack the eggs into the oil and scramble it till you see small clumps of egg.With a little moisture in the eggs,mix in the rice and stir well.The little bit of moisture will help flavor the rice.Once everything is mixed in well for about 5 minutes,add in the soy sauce,agave nectar and salt.Mix well.Sprinkle the pepper powder in and taste to make sure there's enough salt.You may want to add more salt according to your preference.
Turn the heat off and add in the scallions.Mix the rice and make sure to scrape the bottom to avoid any burning.Garnish and to add more spice,you could serve the fried rice with some sliced chili in either fish sauce or a mixture of 1/2 tsp soy sauce and 1/2 tsp white vinegar as a condiment.


So there you have it.Its really simple and you don't have to slave in the kitchen for hours.There's always been a misconception that Thai foods are not easy to be made and the only place you'd get some is if you went to a Thai restaurant.Well,I'd like to put that to rest because  Thai foods as I have learned,is not as complicated to make.My 3 year old loves fried rice and whenever I make it,its always nice to see him enjoying it.You can always substitute the chicken and shrimp for other meats and if you're not a fan of seafood,you can always leave out the shrimp.Don't be afraid to try it.Enjoy the recipe!


With love for food and you,
 Renu


Monday, May 16, 2011

Yum Muffin Yum!

Muffins in general are delicious and you know you can't go wrong when chocolate is added to it but I think I found a perfect 3 way marriage of ingredients that makes this recipe so super delish and its turned out to become a favorite amongst friends and family.So much so,I had second thoughts about sharing the recipe and maybe call it my very own secret recipe but then it would be selfish of me and what good will it do if I didn't share such goodness.So here it is for all of you to try and enjoy and Yovania,this is especially for you.


Banana nut white chocolate muffins


You'll need:


1 3/4 cups All purpose flour
1/2 cup Stevia or other natural sweeteners like Agave nectar
2 1/2 tbsp Light brown sugar
1 tsp Baking powder
1/2 tsp Baking soda
1/4 tsp Salt
1/2 cup (2 ounces) White chocolate chips or chunks
3 large Ripe bananas,mashed well (about 1-1/2 cups)
1/2 cup Crushed almonds
1/2 cup  Unsalted butter , melted and cooled
2 large Eggs, lightly beaten
1 tsp pure Vanilla extract
1/4 tsp Ground nutmeg (preferably fresh grated nutmeg*)
1/3 cup Milk (optional)


Method:


 Preheat oven to 350 degrees F (180 degrees C) and place the oven rack in the middle of the oven. Either line 12 muffin cups with paper liners, or you can butter or spray them with a non stick vegetable spray.It makes a nicer presentation and easier to serve when paper liners are used.


In a large bowl combine the flour,sugars,baking powder,baking soda,salt,white chocolate chips and crushed almonds.This is where my 3 year old comes in handy.


In a medium-sized bowl combine the mashed bananas, melted butter, eggs, and vanilla. With a rubber spatula or wooden spoon, lightly fold the wet ingredients (banana mixture) into the dry ingredients in the larger bowl with the dry ingredients just until combined and the batter is thick and chunky.Add milk if you think the batter looks too dry.Pour and mix gradually so you don't make it too watery.The key is not to over mix the batter. Over mixing the batter will only make tough, rubbery muffins.Spoon the batter into the prepared muffin tins.You want to fill it till its almost to the top for the muffin top affect. Top batter with either almonds or white chocolate or both. Bake about 20 - 25 minutes or until a toothpick inserted in the center comes out clean. Place on a wire rack to cool for five minutes and then remove muffins from pan. Serve warm or at room temperature

The combination of the crunchiness of the almonds incorporated into the batter,the delicious fragrance and flavor of the ripened bananas and the sweetness of the melted white chocolate chips are just a wonderful burst of flavors in your mouth when you take the first bite.My suggestion,serve it warm for the full effect.Those are the 3 ingredients I talked about before.

This is a great recipe to share with friends and family or you could just bake for yourself and eat it all up.Whatever your preference is,enjoy the process and remember that how you feel during the process is how your baking will turn out.So have fun,stay relaxed,enjoy and know that you will be rewarded when you see the smiles on the faces (including your own) of the people you serve.


Our dear friends Luis and Yovania loving the warm muffins

These were gone in a blink
*You can get dried or fresh nutmeg at your local grocery store and if not I know whole foods usually has them.

With love for food and you,
 Renu

Sunday, May 15, 2011

A Birthday gift for me

So to celebrate my birthday and the launch of this blog,my boys decided to get me something that is quite appropriate for the occasion.....I love it so much I've decided it will hang in my kitchen but I don't want to wear it because I don't want to ruin it.It was the cutest idea and I love my boys for coming up with it so thank you hubby and baby for such a wonderfully encouraging gift that I will cherish.
Isn't that the cutest gift held by the cuties of my life!

I thought I'd share this with you!

With love for food and you,

Renu

Spicy meatloaf,anyone?

Here's a delicious meatloaf recipe that I stumbled upon but to add some Asian flare,I kicked up the spice level in it and hey presto.....a delicious spicy meatloaf.Now,here's something I never had before moving to the US.My mother who came from a devout Hindu background didn't eat red meat as cows are seen as sacred animals in the religion.So,we never had beef.Well,I didn't but I know my brothers would sneak in a Big Mac or street vendor beef burger( Ramli Burger) every so often....Yes,brothers I knew! So,I learned the goodness of meatloaf when I had my first one about 4 years ago...Can't quite remember where I had it and I have had my variety of good and bad meatloaf so here I am now,with my own blend and as I love spicy foods,I've managed to sneak that into a classic American dish.
Anyway,here's the recipe.


Spicy Meatloaf 


You'll need:


1 cup  Onion(finely chopped)
1 Celery rib(finely chopped) *A celery rib is individual portion of a celery.when you break off a piece,thats a rib
1 tbsp minced Garlic
1 Carrot(peeled and chopped finely)
1/2 cup Scallions (use 1/2 cup onion as a substitute)
2 tbsp unsalted Butter
2 tsp Salt (use 1 1/2 teaspoons if using Italian sausage)
1 1/2 tsp freshly Ground pepper
2 tsp Worcestershire sauce
2/3 cup Ketchup
1 tsp Sriracha* hot sauce or any other Asian chilli sauces sriracha hot sauces can be found in the Asian aisle major grocery chains or at an Asian specialty store
1 1/2 lbs Ground Chuck*Ground chuck comes from the shoulder and neck area of the cow and has immense flavoring and 15-20%fat
3/4 lbs Spicy ground pork sausage or Italian sausage (a mix of sweet and hot if you are using links)
1 cup Fresh bread crumbs*
2 large Eggs (slightly beaten)
1/3 cup Fresh curled parsley leaves (minced)

Ready to be chopped
Sauteed carrots,celery and onions


Method:

Ready to be baked meatloaf.I made a big one and a baby one

 Preheat oven to 350 degrees F. In a large heavy skillet cook the onion, celery, carrot, garlic, and scallions in butter, over medium heat, stirring, for about 5 minutes. Cover the skillet and stir occasionally until the carrots are tender, about 5 more minutes. Stir in salt and pepper, Worcestershire sauce,1/3 cup of ketchup and Sriracha hot sauce. Cook for 1 more minute. In a large bowl,remove sausages from casing and combine the meats, eggs, vegetables, bread crumbs, and parsley. Form into a loaf and put into a rectangular baking pan with 2-inch high sides. Cover the loaf with remaining ketchup. Bake the meatloaf in the oven for about  an hour. Make sure the internal temperature is between 160-170 degrees F. To do this,you'll need a kitchen or meat thermometer.

Dinner is served!!It was super delicious.
Serves 4 to 6, with plenty for leftovers for delicious meatloaf sandwiches for lunch the next day.


Oven toasted bread for crumbs


*To get fresh bread crumbs,you can toast a store bought bread of your choice(french,whole wheat, chiabatta,italian) for 15-20 minutes till its brown.


This recipe is for a spicy meatloaf so if you prefer not having as much spice,you can make this recipe without using the hot sauce.The spicy italian sausages have a little kick of spice to them..not enough to burn your mouth.So,enjoy trying this recipe out and do let me know how it goes.


My little boy enjoying his meatloaf dinner and boy did he devour that.


With love for food and you,

Renu


Saturday, May 14, 2011

Healthy baked goods?Its possible

I decided to make some cookies a few days ago and wanted to make sure they were healthy but tasty so I experimented with a recipe and it turned out great.Its not your typical chewy cookie because I used less flour that contributes to the chewy factor.So heres my modified version of an oatmeal raisin cookie.I used a few more ingredients to derive flavors so I could use less sugar.  The one thing that I never did growing up is bake because we didn't have ovens which was typical in most homes in Malaysia.I remember that we had a seperate plug in oven that was bulky and round.Not very easy to use either so we never did.I picked up baking after I moved here and volunteering in kitchen service at a religious institute gave me the knowledge of baking.Plus,I enjoy baked goods more as desserts.So,here it is.

Oatmeal raisin,chocolate chip,almond cookie

You'll need:


1 cup Unsalted butter at room temperature(preferably Smart balance.its heart healthy)
1/4 cup  Light or dark brown sugar
1/3 cup Stevia or natural sweetener(I tend to stay away from the artificial sweeteners)
2 large Eggs
1 tsp Pure vanilla extract
1 1/2 cups  All purpose flour
1 tsp Baking soda
1 tsp Salt
1/2 tsp Ground cinnamon
2 cups  Old-fashioned rolled oats(Quaker oatmeal works)
1 cup  Dark raisins
1 cup Dark chocolate chip

1/2 cup Crushed almonds


Method:


Preheat oven to 350 degrees F  with oven rack in the center of the oven.Line two baking sheets with parchment paper. 

In the bowl of your electric mixer(I love my Kitchen-Aid stand mixer) or with a hand mixer, beat the butter and Stevia or natural sweetener until creamy and smooth (about 2 - 3 minutes). Add the eggs, one at a time, beating after each addition. Beat in the vanilla extract. In a separate bowl, whisk together the flour, baking soda, salt, and ground cinnamon. Add the flour mixture to the creamed mixture and beat until incorporated. Stir in the rolled oats,raisins,chocolate chips and almonds.
For large cookies, use a generous 1/4 cup of batter (I like to use an ice cream scoop) and place six cookies on each baking sheet. For smaller cookies,use a tablespoon of batter. Flatten the cookies slightly so they are about 1/2 inch thick. Bake the cookies for about 14 -18 minutes rotating the cookie sheets halfway through the baking time. The cookies are done when golden brown around the edges but still a little soft in the centers. (The longer the cookies bake the more crispy they will be.) Remove from oven and let the cookies cool a few minutes on the baking sheet before transferring them to a wire rack to finish cooling. These cookies will keep several days at room temperature.

Makes about 18 large cookies

There you go....enjoy.I find baking to be therapeutic and I just take it easy when I bake.I believe that the more calmer you are during the process,the better your cookies will come out and if you're on the edge,so will your cookies be..on the edge ready to crumble.So enjoy the process and everything will turn out as great as you want it to.Have fun trying this recipe and remember that this is not your typical Oatmeal cookie as it has more of a crumbly texture yet delicious and wholesome.


With love for food and you,

Renu


Friday, May 13, 2011

So The Adventure Begins!!

I have for the last 3 years been putting up pictures of all my cookings and bakings on Facebook but in order to share recipes,I'd have to send a message so I thought why not do this so I can share with everyone the delicious recipes I have been trying out.So I started this blog in hopes that it will introduce you to a whole new world of delicious yet healthy cuisines.So for all my friends on facebook who have been very loyal and encouraging followers,I owe you these recipes.For those of you who are just joining me,WELCOME and I hope it serves you well.

I wanted to start my blog with a recipe that I loved as a child which has been in the family for generations and I still can't get enough of it and thank God I've mastered it or else every time I want it,I'd have to fly my mom to come see us which is impossible or absolutely be deprived of such goodness.I remember as a teenager,I used to hate being called over to help in the kitchen.Let it be peeling carrots or chopping an onion,I'd rather be in my room blasting I Linkin Park to express my rebellion...typical teenage stuff eh?Well,I'm kindda glad my mom did that coz somehow( I think its magic or my mom's silent prayer that I'd be a good homemaker one day) her amazing skills rubbed off on me a little and Yes,my mother is an amazing cook.So Amma,this is for you!


Chicken Masala


Total time:45 minutes


You'll need:

4-5 Boneless Chicken Breasts(cut into bite sized pieces)


Marinade:


1/2 Large Onion(quartered)
1 1/2 inches Ginger
6-7 cloves Garlic
1 Green chilli(if you like it real spicy)

Using a blender or food processor,grind all ingredients into a paste.You could also use a mortar and pestle for a more authentic feel. Pour paste onto your chicken pieces and mix well to make sure all the pieces are coated.Set aside.

Curry Sauce:


2 sticks Cinnamon
3 pieces Star Anise
5 pieces Cloves
6-7 Curry Leaves (these can be hard to find so don't worry if you don't use them)
4 tbsp  Chicken curry powder(or regular curry powder that you find in the store.Just add 1/2          teaspoon cumin powder)
1 tbsp Tumeric powder
1/2-1 tbsp Chilli powder(adjust to your preference of spice)

Blend all 3 powders with water into a think paste and set aside

2 large Potatoes (or 4 small cut into small pieces)
2 medium Carrots (Peeled and cut into thin slices)
1 1/2 cups Peas(fresh or frozen)
1 1/2 tbsp Ghee(Indian clarified butter) or  vegetable oil
1 tbsp thick Coconut paste or 1/4 cup Milk
Salt to taste

Garnish:
Coriander leaves


Method:or as I call it,The fun part!


Heat Ghee/oil in a large skillet or wok(I prefer the wok).Add cinnamon,star anise,cloves and curry leaves and saute till aromatic.Make sure not to burn. Immediately add the curry paste mix and saute for another 5 minutes.Add a small amount of water if it gets too dry.You want a think gravy consistency.Let it come to a boil as this cooks it thoroughly and takes away the raw taste of curry powder.Next,add the potatoes and cook till its almost tender and then add the carrots.Make sure the vegetables are mostly cooked before you add the chicken.You don't want to bite into raw potatoes.Once that is done,add the chicken with the marinade and cook thoroughly for about 15 minutes.Add peas and blend in well to cook.Add salt in small amounts so you don't over salt the dish and lastly,stir in the coconut paste or milk and let it simmer for another 10 minutes.Garnish with coriander leaves and serve with either rice of your choice or any indian bread.I sometimes eat it with regular bread..its just so yummy!


So there you have it.....my mom's chicken masala.Enjoy cooking and please do give me feedbacks as to how your experience was.I'd love to hear from you.


Have a great time cooking!


This one didn't have the peas or carrots.It was just chicken and potatoes.
With love for food and you,


Renu